Apple Pie!

Hi everyone. I have a fun card to share. I have been wanting to make a pie card so I used some Spellbinder dies. I also used some fun stencils from A Colorful Life Designs. Make sure and use my code VonFan10 to save 10% off your purchase.

I thought this card would be fun to use the Silverware Stencil and Buffalo Plaid Stencil from A Colorful Life Designs. I first started out with white cardstock and ink blended the Buffalo Plaid Stencil with Hero Arts Ombre Lime to forever Green. I ink blended the fork from the Silverware Stencil with Lost Shadow Distress ink. I then fussy cut the fork out with a white border. I then ink blended my pie from Spellbinders Serve A Slice die set with Tea Dye Distress ink for the crust and Hero Arts Ombre ink for the Apple pie. I also put together the apple slice from Spellbinders Delicious Decorations.

Next, I used a circle die from the Greetery and cut it out with white cardstock. I then cut the circle to look like a white paper plate. I ink blended some white hearts for decorations from the Delicious Decorations die set with the same green ink color. I stamped a sentiment from the perfect pie sentiments stamp set onto my panel with black ink. I glued everything to a A2 card base and lastly, added some Lawn Fawn glitter glaze to look like sugar crystals on my slice of pie. I hope you like my card. It was so much fun to make. I need to make a few more soon. Check out A Colorful Life Designs here

Supplies:

Affiliate Links have been added but of course no extra charge to you when you use my links.
Thank you so much for your support, I appreciate it.

BYSHC Sketch 35

Hi everyone! I have another card for the BYSHC Sketch 35. I really love this sketch. I hope you do too. It’s so nice getting Christmas Cards done early and for Christmas in July. Everyone’s in the Christmas Spirit too.

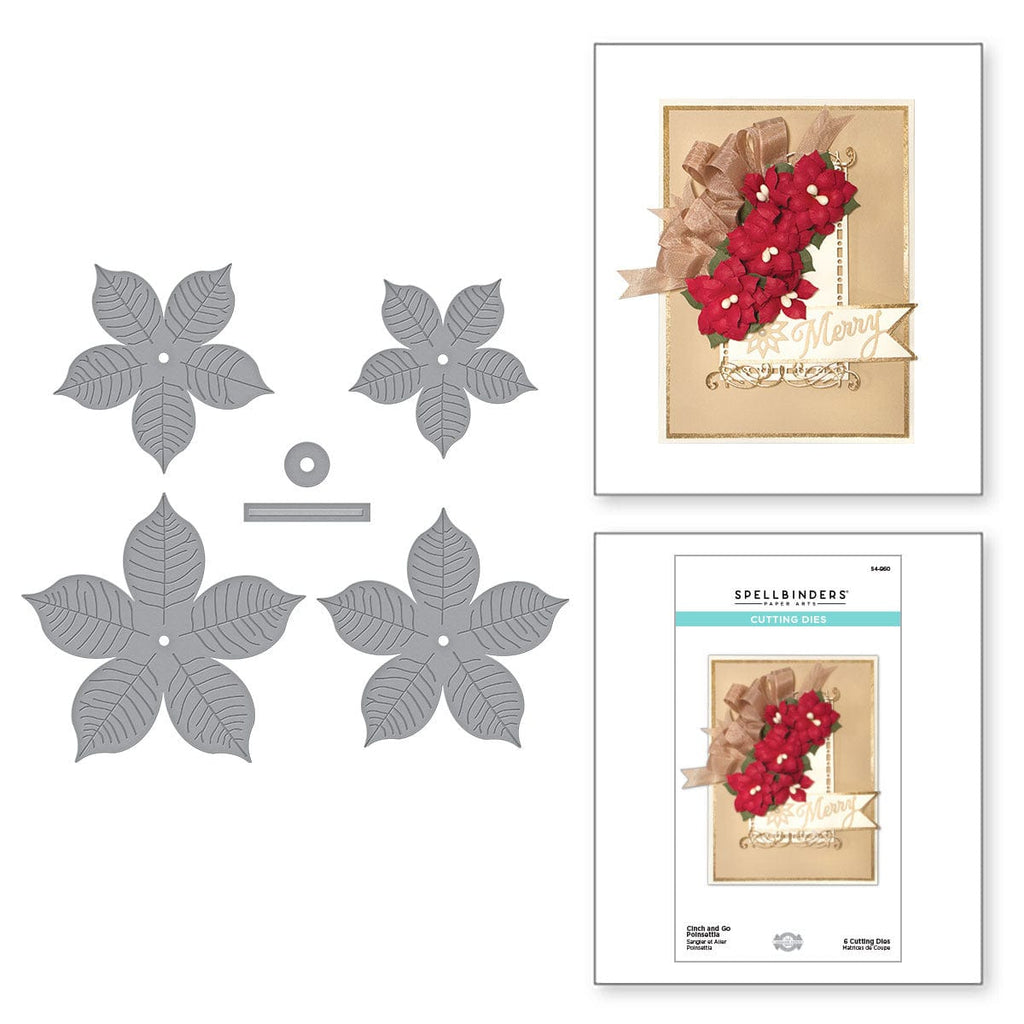
On my card, I cut out my pattern papers according to the measurements in the sketch. I then used a Poinsettia die set from Spellbinders and cut my pieces out with pattern paper and green cardstock.

I glued everything to a A2 card base and added some red ribbon bows for the elements on the sketch. My sentiment is from a Tim Holtz ideaology quote chips set that I have had in my stash. I hope you like my card. There is still time to participate in this sketch challenge for July. Crystal is so sweet and always has a prize. Christmas in July Linky Party starts soon, so get ready!

Supplies:

Shapeabilities Cinch and Go Poinsettia Etched Dies Etched Dies A Charming Christmas Collection by Becca Feeken (S4-960) Combo Image

Affiliate Links have been used and are at no extra additional costs to you. I really appreciate your Support. Thank you.

July Mid Month Inspiration-A Colorful Life Designs

Hello everyone. It’s Mid Month Inspiration for A Colorful Life Designs. What does that mean you ask? That a New stencil that is featured and on SALE. This Months Stencil is called Pretty Tile. You can also use my DT code VonFan10 to save 10% off your purchase. Sale runs from July15-22.

On my card today, I used The New Mid Month Inspiration Pretty Tile Stencil with colored cardstock. I had this color in my stash and it is textured. I applied Catherine Pooler Dress Blues Dye ink with a blending brush. I love how it came out. I cut out my background with a A2 stitched rectangle die.

Next, I glued my panel to a A2 card base. I found a foiled sentiment strip in my stash and cut it so just the Hello was present. I adhered my sentiment with foam tape and glued some gold embellishments to match. I hope you like my card and grab this stencil at a really great price. Don’t forget to use my code VonFan10 and my affiliate link. Shop the New Release here

Affiliate Links have been used and are at no extra additional costs to you. I really appreciate your Support. Thank you.

Shark Week IG Hop #2

Hi everyone. I’m so excited to be invited to participate in another Shark Week Hop hosted by my friend Kelly. Newton’s Nook Designs is the Sponsor for this hop. Super Exciting. I used some fun stencils from A Colorful Life Designs of course. Use my code VonFan10 to save 10% off your purchases.

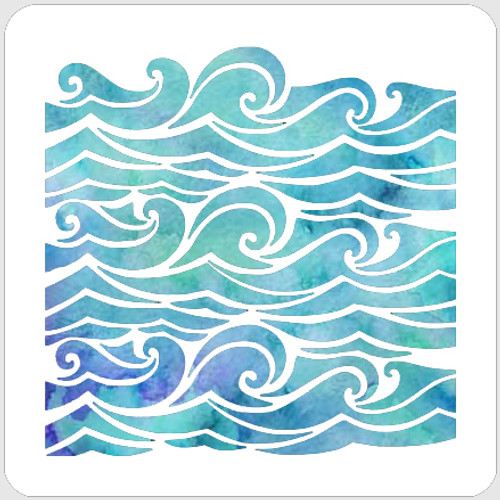
On my card I used Marvelous Masks Ornaments Stencil #4 from A Colorful Life Designs. I grabbed some white cardstock and placed my stencil over my cardstock using my magnets to hold it down. I used some masking tape and masked the ornament so just my circle was present. Pretty easy to do. I ink blended in my circle with Salty Ocean Distress Oxide ink. I then used Prize Ribbon Distress ink and layered the Waves Stencil over it from a Colorful Life Designs and ink blended it.

I was going to leave it like that with a white space but I decided to used the negative circle from the Marvelous Masks Ornament stencils and ink blend around it. I used Chipped Sapphire Distress Oxide ink and black ink to ink blend around my circled wave. I used white paint and water and flicked some onto my background.

I cut my background with a retired rectangle die from MFT Stamps. I then stamped this cute shark from Averyelle Stamps called Shark Hugs with black ink and colored him in with Copic and Ohuhu Markers. I then fussy cut him out. I stamped and heat embossed my sentiment on black cardstock with white ink and WOW Bright White embossing Powder. I cut my sentiment into a strip. I glued everything to a white top folding card base and popped my sentiment with a foam strip. Lastly, I added some white gel accents and clear baubles. I hope you like my card. I had fun making it. Shop A Colorful Life Designs here and use my code VonFan10 to save 10% off your purchases.

I hope you check out the hop it will be lots of fun and fun shark inspiration. Hop ends 7/16/23 @12pm EST. Start at the hop @kellysantidesigns or you can find me @vonmariedesign

Supplies:

017228 - Waves

018155 - Marvelous Masks Ornaments

Affiliate Links have been used and are at no extra additional costs to you. I really appreciate your Support. Thank you.

Suits Tag

Hello everyone. I have a tag I made using a New Stencil from A Colorful Life Designs called Suits. Use VonFan10 to save 10% off your purchase.

I used a Ranger Manila Craft Tag Size 8 for my tag. I was trying to do some Mixed Media. I’m a Newbie. I ink blended my tag with Vintage Photo Distress ink. I then sprayed some Distress Mica Stain Spray in Empty Tome. I ink blended the New Suits Stencil over my ink and spray once dried using Distress ink in Candied Apple and black ink.

I tied a ribbon and added a sentiment strip with a foam strip. I decorated my tag with some fun retired Doodles Paper Playground Sparkle Blend Mix in Double or Nothing. I hope you like my tag. I’m thinking it will be a great Birthday Tag. Visit the New Release here

Affiliate Links have been used and are at no extra additional costs to you. I really appreciate your Support. Thank you.

Shark Week IG Hop

Hi everyone! I’m super excited to be participating in a Shark Week IG hop hosted by my friend Kelly. There is 2 sponsors for this hop Whimsy Stamps and Hero Arts. Amazing Right? Duh Na Duh Na

Did you know Female Great White Sharks are bigger than Male Sharks?

On my card I used A Colorful Life Designs New Marvelous Masks Postage Stamp Set B and Shark Week Stencils. I first grabbed some white cardstock and placed stencil 4.5 onto my cardstock I ink blended it with Lawn Fawn Moonstone ink. I then used the negative stencil and placed it where I just ink blended. I then ink blended around it using Simon says Stamp Twilight ink. Next, I placed my postage stamp stencil back on and layered it with the Shark Week Stencil. This shark week stencil has different sizes of sharks which I love. I used Simon Says Stamp Fog ink to ink blend my sharks gray.

I then cut out my background with a stitched A2 rectangle die. I stamped a shark on white cardstock with Memento black ink from a Retired MFT Stamps called Friends with Fins. I colored it with copic markers and then fussy cut it out. I also stamped a sentiment from the same stamp set and cut it out with my paper trimmer. I added my panel to a A2 card base with liquid glue as well as my shark. My sentiment with added with foam tape. I hope you like my card. If shopping at A Colorful Life Designs, use VonFan10 to save 10% off your purchase.

*You have until 7/14/23 12pm EST. to complete the hop to be eligible to win an Amazing Prize from Whimsy Stamps or Hero Arts. You can also find me @vonmariedesign to find the hop on IG. I believe international can also be eligible. Thank you to Kelly for inviting me and for a fun shark week hop.

Until Next Time, Happy Crafting!

Supplies:

Affiliate Links have been added but of course no extra charge to you when you use my links.
Thank you so much for your support, I appreciate it.

Smiley Faces

Hello everyone. I have a Smiley Faces card for you today using a New fun stencil from A Colorful Life Designs New July Release. Use VonFan10 to save 10% off your purchases.

This Smiley Face Stencil from A Colorful Life Designs is so much fun. I see so much of smiley Face Clothing, jewelry, and hats. My kids and I do own some Smiley Face Accessories LOL. So popular right now. Okay for my card, I used Hammermill cardstock and ink blended the stencil with a small brush using inks Catherine Pooler Dress Blues, Simon Says Stamp Guava ink, and Simon says Stamp Lucky ink. This stencil would be fun with 1 ink color or many. I hope you have fun with it.

After I was done ink blending i cut out my background with a rectangle die. I used a circle punch from my stash and ink blended a smiley face using Guava ink. I cut out a circle smile sentiment using a die and white cardstock. I ink blended it using Dress Blues ink and added it to my panel with foam tape as well as my smiley Face Circle. My panel was glued to a A2 card base. I chose not to embellish with sequins or anything. I hope you like it. Check out the New Release here.

Supplies:

Affiliate Links have been used and are at no extra additional costs to you. I really appreciate your Support. Thank you.

Doodle Loops

Hi everyone. I’m back with a card using a New Stencil and New Stamp from A Colorful Life Designs New July Release. If shopping use my code VonFan10 to save 10% off your purchase.

On Kraft cardstock, I ink blended the Doodle Loops Stencil with Pinkfresh Studio Passion Fruit Dye ink. It’s such a Beautiful stencil. I then cut out my background with a rectangle A2 die.

I stamped a sentiment from the New Amazing Stamp set with black ink. I layered my panel onto red cardstock and glued them to a A2 card base. I felt like the doodles looked like flowers so I added a few red sequins to the centers. That finishes this card, You can easily mass produce with any color or cardstock for any Occasion. Use VonFan10 to save. Check out the New Release here.

Until Next Time, Happy Crafting!

Supplies:

Affiliate Links have been added but of course no extra charge to you when you use my links.
Thank you so much for your support, I appreciate it.

Lemon Cupcake Mini Slimline Cards

Hello everyone. I have a Video today using a Cupcake Layering Stamp set. I also use a Stencil and Lemon embellishments.

You can watch down below how I made these cards here or on YouTube

Do you love Cupcakes? How about Lemon Cupcakes?

On my Mini Slimline cards for today, I used Hero Arts Color Layering Cupcake Stamp and Die set. I used Recollections 110lb cardstock. I cut my cardstock to fit in my Misti Stamping Platform. I recommend a Misti or some kind of Stamping Tool in case you need to Multi Stamp. For the frosting which has 2 images I used Catherine Pooler Tiara and and Sauna ink Minis. For the cake I used Buttercream and Whipped Honey Regular size ink pads from Catherine Pooler. Next, for the Cupcake Wrapper I used Catherine Pooler ink Minis in Aquatini and Daydream.

I cut out my Cupcakes with the Cupcake die and fussy cut some out using a white border. I used a Layered Lemons Stencil from A Colorful Life Designs using the same inks Tiara, Sauna, Aquatini, and Daydream. I cut out my panels using a 2nd to the largest stitched Mini Slimline Dies from Trinity Stamps. I used the largest Mini Slimline Die with white cardstock and ink blended it with Aquatini and Daydream ink.

I stamped my sentiment with Aquatini on the Recollections cardstock using You Shine from Simon says Stamp. I cut my sentiment with a paper trimmer and I used my tape runner to put my cards together. My Mini Slimline card bases are using Recollections Cardstock 110lb. to match. Lastly, I added some Lemonade Stand Mix from Trinity Stamps. I hope you like my card and enjoyed my video. I hope I inspired you to make some cards using layering stamps. They are really fun.

Until Next Time, Happy Crafting!

Supplies:

Use VonFan10 to save 10% off your purchase

Affiliate links:
Affiliate Links have been added but of course no extra charge to you when you use my links.
Thank you so much for your support, I appreciate it.

Messy Harlequin

Hi everyone. I have a fun card today using a New Stencil from A Colorful Life Designs New Release called Messy Harlequin. Use VonFan10 to save 10% off your purchase.

I really love this New Messy Harlequin Stencil. Right away I thought of making a Alice card. I started out with white cardstock and ink blended the stencil with Peacock Feathers Distress ink. I then used I’m Late stamp set from Creative Expressions to stamp Alice in black ink onto my background.

My background was then cut out with a A2 scalloped rectangle die from my stash. I stamped a sentiment with black ink from Creative Expressions Greetings from Wonderland stamp set. I ink blended the edges of my panel a bit more with Peacock Feathers Distress ink and added it to a matching blue A2 card base. I used some sequins to embellish and that finishes my card. I hope you like it. Visit A Colorful Life Designs here

Supplies:

Affiliate Links have been added but of course no extra charge to you when you use my links.
Thank you so much for your support, I appreciate it.

Celebrate

Hi everyone. Happy 4th of July. I hope you have a fun and safe Holiday. I have a card for the Inky Paws Sketch Challenge #201 Do you love Challenges? I do especially sketch challenges.

I thought this sketch was so much fun. I used Newton’s Nook Designs Stamp Set called Newton’s 4th of July. I thought it was perfect for this challenge.

I started out with white cardstock. I ink blended it first with Seedless Preserves Distress Oxide ink, Prize Ribbon Distress Oxide ink, and Picked Raspberry Distress Oxide ink. I sprayed my paper with water and then dried the excess with a paper towel. I cut pattern papers from a Summer Paper pack from my stash and cut out a stitched oval from Vellum cardstock.

Next, I stamped Newton and colored him up with my copic markers. I fussy cut him out and added some white gel accents with a gel pen. I also used a glitter pen on his sparklers. Stamped and embossed some fireworks from the stamp set and stamped and embossed a sentiment. I glued everything to a A2 top folding card base. I hope you like it. I had fun making it.

Until Next Time, Happy Crafting.

Stars and Stripes

Hi everyone. Happy Independence Day. I have a fun festive card Today I used some fun stencils from A Colorful Life Designs. Use VonFan10 to save 10% off your purchases.

I used the Stars and Stripes Stencil and Balloon Set Stencil from A Colorful Life Designs for my card today. I love these stencils. I started out with white cardstock. I used the Stars and Stripes Stencil first using the Diagonal Lines in Red Hot ink cube from Gina K Designs. I then used the Balloon Set Stencil for the Star Balloons that I ink blended with Gina K Designs Blue Denim ink cube. I also ink blended the Balloon strings and the Balloon knots. I then took the Stars and Stripes stencil for the tiny stars that I ink blended in the star balloons with Hero Arts Unicorn ink.

I cut my background to be smaller than A2 and glued it to a A2 side folding card base. I added a sentiment strip pre-made from my stash and adhered it with a foam strip. That finishes my card. I chose no embellishments I thought it had enough detail. I hope your Holiday is fun and safe.

Thank you for stopping by! Visit the New Release here.

Supplies:

Affiliate Links have been added but of course no extra charge to you when you use my links.
Thank you so much for your support, I appreciate it.
Sending Happy Thoughts

Hello everyone. Today for my card I’m using the New Marvelous Masks Postage Stamp Set A from A Colorful Life Designs July 2023 Release. There are 2 New sets A & B just added to the store. They are greats sets to own and I think you will reach for them a lot for your projects. Use VonFan10 to save 10% off your order. My code only Excludes the Master Creator Bundle marked down 20%.

I actually used 2 stencils for my card. I started out with white cardstock and ink blended the New Marvelous Masks Postage Stamp #5 Stencil with Simon Says Stamp Bubblegum ink. I then placed my second stencil Love Letters over the Postage Stamp and ink blended with Simon says Stamp Teeny Bikini ink. I love how it looks with a white border.

Next, I used a stitched A2 rectangle die and cut out my ink blended background. I stamped my sentiments from the Happy Thoughts Stamp set with black ink and added some pink sequins. My panel was then added to a A2 side folding card base. I hope you like it. What I love about this stencil set is that you get masks so you can create with more colors or a scene oh how about a Post card? The possibilities are endless. I hope you grab these sets.

Thank you so much for stopping by. Check out the New Release here.

Supplies:

Affiliate Links have been added but of course no extra charge to you when you use my links.
Thank you so much for your support, I appreciate it.

A Colorful Life Designs July 2023 Release

Hello everyone. I’m so excited for the New A Colorful Life Designs July 2023 Release. I have a video today showing the New Layered Arches Stencil and New Amazing Stamp set. You can always use my code VonFan10 to save 10% off your purchases.

You can watch below or on my YouTube Channel

I used the New Layered Arches Stencil and Amazing Stamp Set. This set comes with 2 stencils. I used the brick stencil only for my card today. I ink blended with some Hammermill cardstock 110lb. with Milled Lavender Distress Oxide ink with the Arches Stencil. I used my Make Art Stay-tion to ink blend easily. I then used Catherine Pooler ink in Dress Blues to help with my background. You can easily leave it white or this stencil will be your stencil for a lot of Occasions in a variety of colors.

Next, I cut my background A2 size 4 1/4 x 5 1/2 using my paper trimmer. I then placed my panel in my Mini Misti stamping platform and stamped a sentiment from the New Amazing Stamp set with Versafine black Onyx ink. I used a butterfly die set from Tim Holtz and ink blended the base of the butterfly with Milled Lavender Distress Oxide ink and cut out the top with black cardstock. I glued my panel to a A2 card base and glued my butterfly. I added some sequins and that finishes my card. I hope you like it. I had fun making it as always.

Supplies:

Affiliate Links have been added but of course no extra charge to you when you use my links.
Thank you so much for your support, I appreciate it.

BYSHC Sketch 35

Hello everyone Happy July! There is a New BYSHC Sketch Challenge #35 that starts today and you have all month to play. I really think your going to love this one!!

I love this New sketch!!! I chose to use Unity Stamp Company Whit’s Weenies Rubber stamps illustrated by Angie Blom. I already had these stamped images stamped and cut out with my Brother Scan N Cut. So for this card I used the one pup and tree. I cut out some Christmas Pattern Paper from American Crafts 6×6 paper Pad from my stash using the measurements on the Sketch 35 and my paper trimmer.

I glued everything to a A2 side folding card base. I stamped a sentiment from the same stamp set on a stitched white cardstock banner die-cut with black ink. For the 2 round elements on the sketch I used ribbon that was actually gifted to me from Unity Stamp Company with a purchase. I folded it and cut it to desired. That’s it for this card. I hope you like it and give this sketch a try.

Come join us in the Build Your Stash Holiday Cardmakers Facebook group to play along with the {BYSHC} Sketch Challenge 35! We’d love to see what you create using the June sketch!

The sketch challenge is open for the entire month of July. Entries must be added to the challenge album in the Build Your Stash Holiday Cardmakers Facebook group to be eligible for a prize. The winner will be chosen randomly from the entries and announced in the Facebook group. Join in the fun and start building your stash of holiday cards now. Can’t wait to see what you all create!

Caffeinated Christmas Card Challenge July-Stars

Hello everyone! I’m super excited that A Colorful Life Designs is a sponsor for the Caffeinated Christmas Card Challenge#19 for July. The Theme is Stars. You must make a new Christmas Card featuring Tea, Coffee, or Hot Cocoa using Stars. Also don’t forget to use my coupon code VonFan10 to save at A Colorful Life Designs. Also you can win a gift code to A Colorful Life Designs by participating in this challenge.

On my Caffeinated Christmas card, I chose to use the Fa La La Stencil, Night Sky Stencil, Coffee Stamp, and Cozy Knit Stencil. I first grabbed some Navy A2 Cardstock and used the Night Sky Stencil with some White pigment ink from Gina K Designs for my stars. On white cardstock, I ink blended Lumberjack Plaid Distress ink with the Fa La La Stencil and cut my background with my paper trimmer. I cut out a coffee mug SVG with my Silhouette Cameo using white cardstock from the Silhouette Cameo Design Store. I ink blended the mug with the Knit Stencil using Rustic Wilderness Distress Oxide ink and Lumberjack Plaid Distress ink. The used Ground Espresso Distress ink for the coffee in my mug.

I stamped my sentiment from the Coffee Stamp set with black ink on white cardstock and cut it with my paper trimmer. I put my card together. I love my different elements to be wonky. How about you? My sentiment is added with foam tape and everything is glued with liquid glue to a A2 card base. Lastly, I added some sequins. I hope you like my Caffeinated Christmas card using Stars. I hope you give it a try. There will be a gift code prize which is always exciting. Visit A Colorful Life Designs here and Link your cards here Use hashtag #cccc19 so we can see your cards.

Supplies:

Affiliate Links have been added but of course no extra charge to you when you use my links.
Thank you so much for your support, I appreciate it.

Layered Lemons

Hi everyone. I have a card today using the Layered Lemons Stencil set from A Colorful Life Designs. I love layered stencils and this one is perfect for Summer. Use VonFan10 to save 10% off on your purchases.

I knew I had to have this layering stencil set. I love Lemons and every Summer I crave making a Lemons card. Something about fruit it screams Summer. I first used white cardstock and used the top stencil first and ink blended my lemons with Pinkfresh Studio Sunshine ink. I chose a diagonal design. I then used the Base stencil to layer my leaves with Hero Arts Ombre ink.

I cut out my background with a A2 stitched rectangle die. I stamped this cute lemon from Taylored Expressions Tutti Frutti Stamp with black ink on white cardstock and colored it in with my Copic Markers. I fussy cut my image out and stamped a sentiment from the same stamp set. I cut out my sentiment and popped up my lemon and sentiment with foam tape. I glued my panel to a A2 card base. I added some white gel accents with my gel pen and that finishes off my card. I hope you like it. Check out the newest release here

Supplies:

Affiliate Links have been added but of course no extra charge to you when you use my links.
Thank you so much for your support, I appreciate it

Make A Splash

Hello everyone. I have my last card sample using the New June Release from A Colorful Life Designs. Isn’t it a great release? I love Summer Theme Cards. Don’t forget to use my code VonFan10 to save 10% off your purchases.

I think I saved my best card for last. I love these Marvelous Masks Stencils. This one is called Marvelous Masks Bathing Suit. I used stencil #3 for my card today. I used Rainbow colored inks on white cardstock for my Slimline card. I used Lumber Jack Plaid Distress Oxide ink, Carved Pumpkin Distress Oxide ink, Squeezed Lemonade Distress Oxide ink, Mowed Lawn Distress Oxide ink, Uncharted Mariner Distress Oxide ink, and Villanious ink. Do you love my rainbow bathing suit?

Next, I cut out my Bathing Suits with a Wonky Slimline die from Trinity Stamps. I glued my panel to a Slimline card base. My sentiment is from Pink and Main’s Stay Cool Stamp and die set. I hope you like my card. I had fun making it. Use my code VonFan10 to save. Visit the Newest release here

Supplies:

Affiliate Links have been added but of course no extra charge to you when you use my links.
Thank you so much for your support, I appreciate it

Groovy Wave

Hello everyone. I have another card using a fabulous New Stencil from A Colorful Life Designs. Use VonFan10 to save 10% off your purchase.

On my simple notecard, I used the New Groovy Wave Stencil. I love this funky style. I think its a beautiful stencil and could be used for any Occasion like I used it today. On white cardstock I ink blended the stencil and used Wilted Violet Distress ink and Raspberry Distress Oxide ink. I sprayed some Dylusions ink spray in Funky Fuchsia over my background.

I cut out my background when it was dry with a Mod Rectangle die from Pink and Main using the largest die from the set. I then added a die-cut from my stash and glued my panel to a blue card base. I hope you like my simple card for today. I recommend using this stencil with Pixie Spray for great results. Use VonFan10 to save 10% off your total purchase. Check out the Newest Release here

Supplies:

Affiliate Links have been added but of course no extra charge to you when you use my links.
Thank you so much for your support, I appreciate it

Have A Holly Jolly Christmas

Hello everyone! I have a card to share today that I made for the Masculine Caffeinated Christmas Card Challenge. Rubbernecker Stamps is the Sponsor, so amazing so I wanted to participate.

I always love making Caffeinated cards especially Christmas with Critters. I had to use this cute fox stamp set from Rubberneckers Stamps called Be Wild. On Neenah Solar White 80lb. I stamped some foxes and a mouse from the stamp set with Memento Tuxedo Black ink. I colored them in with my Altenew Alcohol Markers and then fussy cut my images out. I also stamped a Christmas hat and coffee cup from some of my stamps from Catherine Pooler and Avery Elle and fussy cut those out too.

The coffee stitched dies are from My Creative Time called Coffee Gift Card Holder Die that I finally used. I cut my dies out from a Christmas Pattern paper pack 6×6 from Hobby Lobby as well as plain cardstock. I found this sentiment strip in my box of sentiments pre-made so I thought it was perfect for my card. I glued everything to a A2 card base and popped up my fox, mouse, and sentiment with foam strips. Since this is a masculine card I chose no sequins or anything. Only white gel accents with my Gelly Roll pen. I hope you like my card and maybe gave you some inspiration.

Thank you for stopping by!

Fancy Palm

Hi everyone. I have another card featuring A Colorful Life Designs Newest Release. I hope your loving the New Release as much as I am. Use VonFan10 to save 10% off your purchase.

I used the New Fancy Palm Tree Stencil and New Chasing The Sun Stamp Set. I also used Simple Spirals Stencil from a previous Release. I love how big this palm tree is. I started out with white cardstock and chose to ink blend the Fancy Palm with Carved Pumpkin Distress Oxide ink, Squeezed Lemonade Distress Oxide ink, and Tea Dye Distress ink. I used Salvaged Patina Distress ink for my sky with the Simple Spirals Stencil. I think the spirals remind me of a Summer Breeze.

Next, I cut out my Fancy Palm tree with a A2 rectangle die. I placed my panel inside of my Misti Stamping platform and stamped a sentiment from the New Chasing The Sun Stamp set with black ink. I really love this sentiment. Lastly, I added some gems. I hope you like my card. Use VonFan10 to save. Visit the Newest Release here

Supplies:

Affiliate Links have been added but of course no extra charge to you when you use my links.
Thank you so much for your support, I appreciate it

Pineapples

Hi everyone. I have a Birthday card today with lots of pineapples. I used some New Stencils from A Colorful Life Designs. Use VonFan10 to save 10% off your total purchase.

I used the New Pineapple Stencil 3×6 and Layered Pineapples Stencil 6×6. These are fun stencils. I started out with some white cardstock and used the Layered Pineapples stencils which comes with 2 stencils. I used stencil #1 first with some rainbow colored inks. My blending brushes still had ink on them from a previous project so it worked out for my pineapples to have a soft look. I used Tea Dye Distress ink for the leaves using stencil #2. I then cut my background smaller than a A2 size.

Next, I used the New Pineapple Stencil it is a fun stencil that allows you to layer your stencil and is a good size for the focal point on your card. I used white cardstock with Thermoweb Transfer Gel and Rainbow Deco Foil. When it gel was dry I ran all through my Heidi Swapp Minc Machine. I then fussy cut my Rainbow Pineapple. I chose to add a Birthday sentiment strip. Everything was added to a Kraft A2 card base. That finishes this card. I hope you like my card, I think it’s fun. Don’t forget to use my code VonFan10. Check out the New Release here

Have a Awesome Crafting Day!

Supplies:

Affiliate Links have been added but of course no extra charge to you when you use my links.
Thank you so much for your support, I appreciate it.

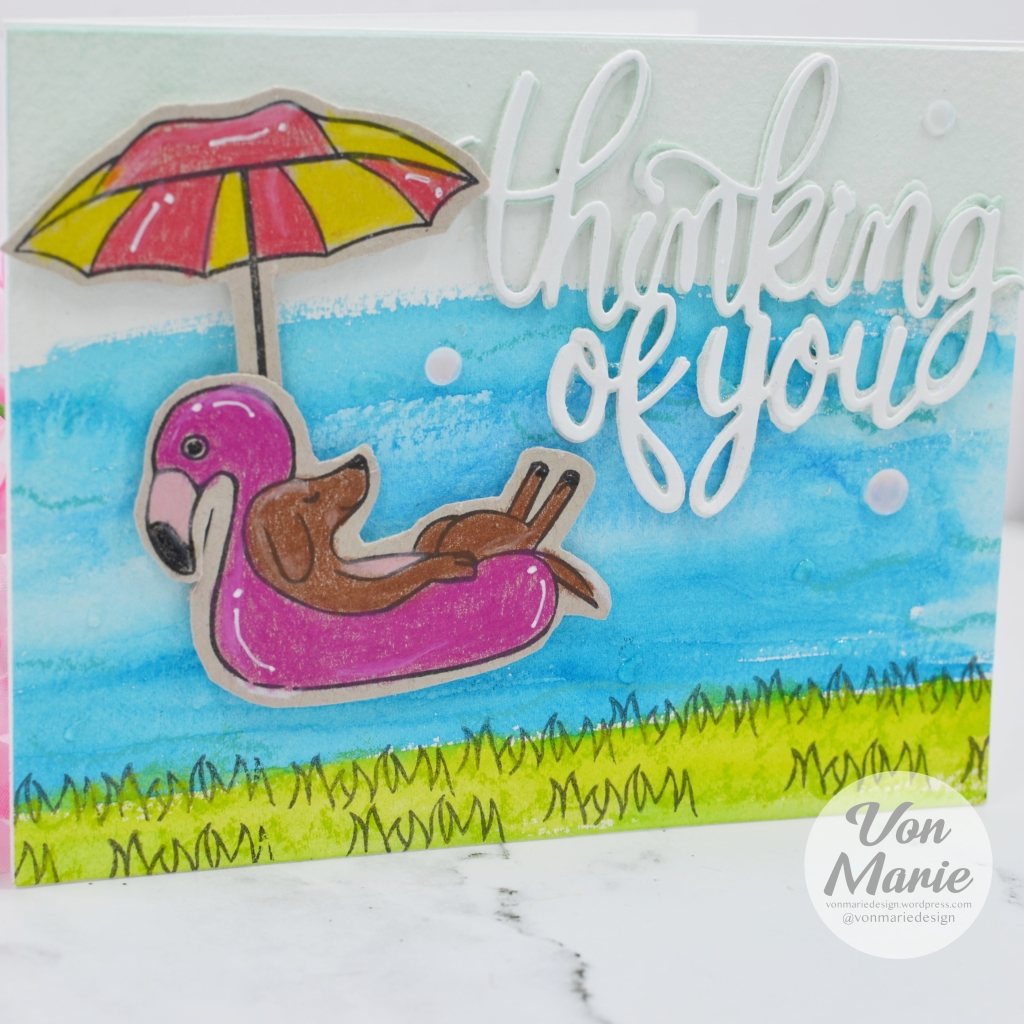
Thinking of You

Hello everyone. I made a card for the June Stay Crafty With a Blog Name Hero Challenge-Sentimental Journey.

I thought this pup was so cute to use and it was the first time I had used this retired stamp set called Lounging Pups. I first grabbed some watercolor paper Fabriano Coldpress 140lb. I water colored some water first using a Altenew Watercolor set and a Paintbrush. I used 3 different blue paint Pans in Deep Blue Seas, Lapis, and Crystal Water. I had fun making some messy water and it was quite relaxing too. I also added some green for grass thinking maybe this pup would be in a pool. So I used Rain Forest and Green Hills paint Pans.

Next, I stamped this cute pup in a flamingo floatie and umbrella on Neenah 80lb. Desert Storm Cardstock with black ink. I colored them in with my Prismacolor Colored Pencils and I fussy cut my images out. I cut out my watercolor background with a Infinity Hero Arts Nested Rectangle Die using the largest die. I then cut out my word die sentiment 3 times with white cardstock and glued them together.

Finally, I put my card together. I glued my background panel to a A2 card base. I glued my sentiment onto my panel with liquid glue. I decided my grass looked plain. So, I stamped the grass image several times with black ink. I added very subtle grass and water lines with my colored pencils to my water and grass areas. I ink blended a simple sky with the Hero Hues Arctic ink cube. I added my pup and umbrella with foam tape. And to decorate I added some clear liquid drops to my water, white gel pen accents to my images, and sequins. That finishes my card. I hope you like it. I would love to be relaxing like that pup.

Until Next Time, Happy Crafting!

Supplies:

Affiliate Links have been added but of course no extra charge to you when you use my links.
Thank you so much for your support, I appreciate it.

Seahorse Bathing Suit

Hello everyone! I’m back with another card using A Colorful Life Designs New Release. It’s such a fun Release. Use VonFan10 to save 10% off your purchase.

On my card today I used the New Marvelous Masks Bathing Stencils. In this stencil set you get the Negative and positive stencils and there are 4 stencils total. On pink cardstock, I used #4 stencil on pink cardstock ink blending it with Uncharted Mariner Distress ink. While the stencil was in place I placed the Seahorses stencil over it and ink blended Salty Ocean Distress Oxide ink. I love how my Seahorses Bathing Suit came out. Super Cute. I cut out my bathing suit with a A2 stitched rectangle die set.

Next, I used the New Stamp Set Chasing the Sun for my sentiment which I stamped in black ink onto my panel. I glued my panel to a A2 top folding card base and added some sequins. I hope you like my card these stencils are so much fun and I hope you grab them. Don’t forget my code to help you save. VonFan10 Shop the New Release here.

Supplies:

Affiliate Links have been added but of course no extra charge to you when you use my links.
Thank you so much for your support, I appreciate it.

Tropical Cards for Father’s Day

Hi everyone! I was super excited to sign up for My Monthly Hero Subscription from Hero Arts and I was able to receive the June Kit. Unfortunately it sold out super fast, I’m so thankful I received one. I chose to make some Father’s Day Cards. This kit is so much fun and I definitely plan on making more cards real soon.

This is the first card I made. I used the watercolor paper included in the kit. I cut my paper A2 size and placed it into my Misti Stamping Platform. I used the largest of the water images and stamped it with Lemon Drop Hero Hues Reactive ink cube first. I did that 2 or 3 times. I then used Taffy Hero Hues Reactive Ink Cube half way on the image. And then the last color ink I used was Splash Hero Hues Reactive ink cube. I used a water brush gently with a little bit of water to glide the ink a little. I stamped the middle size and small size water with taffy and Splash ink cubes. I love how my water came out. I also inked up the top portion of my panel with Hero Hues Arctic Core ink cube for my sky using a blender brush. I then stamped the cloud image a few times with the same ink. I stamped the birds image with black ink and used the half sun image with Taffy Hero Hues ink cube and Creamsicle ink cube.

I ink blended the bottom portion of my panel for the sand with Tattered Rose Distress Oxide ink and Cup O’ Joe ink cube from Hero Arts. I cut out the Beach Window Fancy die with kraft and black cardstock. I layered some of the greenery and also ink blended with Hero Hues Paradise Core Ink Cube. I glued everything to a A2 card base. I then stamped and heat embossed my sentiment on black cardstock and then cut it out with the coordinating die. Which I love that this kit has dies to cut the sentiments out. I cut out a layer for my sentiment to to be glued to for dimension. I ink blended my kraft beach window panel with Cup O’ Joe ink, it’s very subtle but I like it.

Here is my second card. I used white cardstock and not watercolor paper. I stamped the water images and inked them up like I did for my first card. I chose not to stamp the clouds, birds, or sun on this one. Instead, I stamped the sailboat from the stamp set included in this kit with black ink and cut it out with the coordinating die. I ink blended the sand with the same brown inks as the first card.

I used the beach window die only with black cardstock for this card. I stamped and heat embossed another sentiment. There are others to choose from but, I really like this one. I glued everything to a A2 card base. Of course, I chose not to add any embellishments since I made these as Masculine cards for my dads and father in law for Father’s Day. Although I would love to receive a card like this. I think it works for anyone. I hope you like my cards. Do you have a favorite?

Until Next Time, Happy Crafting!

Supplies:

Affiliate Links have been added but of course no extra charge to you when you use my links.
Thank you so much for your support, I appreciate it.

Script Mid Month Inspiration for June 2023

Hi everyone! I wanted to share that the Script Stencil from A Colorful Life Designs is on sale for $4.00 for Mid Month Inspiration for June. Which is a Amazing deal. It’s a 6×6 stencil and it’s perfect for any occasion card. You can also use my code VonFan10 to save 10% off and get this stencil even more discounted.

On white cardstock, I ink blended this beautiful stencil with gold ink and cut it out with a double stitched Slimline die. I love how it came out.

I die-cut some leaves using the Tattered Leaves die from Simon Says stamp and white cardstock. I layered it with 3 die-cuts and glued them to my Slimline panel with liquid glue. I stamped and heat embossed a sentiment from the Oodles Stamp set using gold embossing powder and Vellum cardstock. I cut my sentiment and glued it to my panel carefully. I then embellished with some gold embellishments and glued my panel to a kraft slimline card base. I hope you like my card and grab this stencil while it’s on sale. Use my code VonFan10 to save even more.

Until Next Time, Happy Crafting!

Supplies:

Affiliate Links have been added but of course no extra charge to you when you use my links.
Thank you so much for your support, I appreciate it.
Sweet ‘n Sassy Stamps Splash into Summer Inspiration Hop

Hello everyone! I’m super excited to be participating with Sweet ‘n Sassy Stamps today for a Splash into Summer Inspiration Hop. Make sure and leave comments for your chance to win $25 store credit.

I chose Summer Fruits for my card today. I always crave more fruit in the Summer, they are so refreshing!!! I started off with some white cardstock and I stamped all the fruit images in Memento Tuxedo black ink using my Misti Stamping Platform. I colored my fruits using Copic Markers I arranged them like a wreath so that I could stamps a sentiment in the middle. I ink blended the edges and around my stamps using Simon Says Stamps Velvet Orchid ink.

I stamped and heat embossed the sentiment from Latte Love Stamp set. I think these fruits are definitely better together. I cut out my fruits smaller than a A2 size rectangle and layered it on a blue A2 top folding card base. Lastly, I added some gems and white gel accents. I hope you like my card for today.

Until Next Time, Happy Crafting!

Supplies:

Affiliate Links have been added but of course no extra charge to you when you use my links.
Thank you so much for your support, I appreciate it.

Woodblock Wednesday! June 2023

Hello I have a card for Woodblock Wednesday hosted by my friend Amy. I always have fun looking through my Woodblock Stamps and finding something that will work for a card.

I chose to use these Woodblock stamps from Hero Arts that have been in my stash for quite awhile.

I grabbed a A2 piece of white cardstock. I used an ink cube set called Island Crush from Simon Says Stamp in hybrid ink colors Teeny Bikini, Hot Mama, High Dive, and Lucky. I used these ink colors and stamped the woodblock sentiment in first and second generation stamping all over my cardstock. I had fun stamping and I love the ink colors that coordinate together. I then chose to do a Infinity Shaker card. So, I used a A2 card sleeve and my tape runner to tighten my sleeve the best that I can. I found a confetti mix in my stash and threw some in my sleeve and sealed my confetti. I added my Infinity Shaker panel to a A2 card base.

I then decided my card looked plain so I stamped this Panda on white cardstock in black ink. I fussy cut him out and used tape runner to add him to my card. My card needed something else. I then chose to heat emboss the sentiment on white cardstock with white ink and white embossing powder. I cut it to fit and added foam tape to the back before adhering it to my card. My card is so fun with all those confetti bits. My favorite type of shaker cards to make and so fast too. I did add some pink cheeks to my panda with a Copic Marker. I hope you like my card, I had fun making it and can’t stop shaking it. I hope you join this fun challenge.

Supplies:

Affiliate Links have been added but of course no extra charge to you when you use my links.
Thank you so much for your support, I appreciate it.

Coral Reef

Hello everyone! I have a card today Sea Themed using some New Products from A Colorful Life Designs. Use VonFan10 to save 10% off your total purchase. My coupon excludes the Master Creator Bundle marked down 20% off.

On my card today I used the New Coral Reef Stencil, Oh Bite Me Stamp Set, and Chasing the Sun Stamp set. These are all great New Products from the June Release. I stamped the fish from Oh Bite Me on watercolor paper and colored them in with Tim Holtz Watercolor Pencils sets #1 and #3 in Tattered Rose, Shaded, Candied Apple, Faded Jeans, Tumbled Glass, and Rustic Wilderness. I fussy cut the fish when they were dry.

On my background I water colored my watercolor paper with Altenew Paints in Ocean Waves, Lavender fields, and Mountain Mist using a paintbrush. I used the New Coral Reef stencil and ink blended with Uncharted Mariner Distress ink and Carved Pumpkin Distress Oxide ink over my water colored background. I loved the texture of the stencil on my background. I cut out my background with a stitched A2 rectangle die. I stamped a sentiment from the New Chasing the Sun stamp set. I glued my fish and then added my panel to a A2 card base. Lastly, I added some clear drops. I hope you like my card. Use VonFan10 and treat yourself!

Supplies:

Affiliate Links have been added but of course no extra charge to you when you use my links.
Thank you so much for your support, I appreciate it.

Sketch 34 BYSH Cardmakers

Hi everyone! I’m back with another card for Sketch 34 Hosted by BYSH Cardmakers. This such a fun sketch and a good way to get some Christmas cards done early. I will not have to make any Christmas cards at the end of the year, I’m super excited about that. I hope you join me.

I chose to use these fun penguins from Stampingbella called Snowfight Penguins. I stamped these penguins on Neenah Solar White 80lb. cardstock with Memento Tuxedo Black inka nd colored them with my Copic Markers.

I fussy cut my penguins and created a scene using the sketch, pattern paper, and colored cardstock. This sketch allows for you to create scenes if you would like. I glued everything to a A2 top folding card base. I added some white gel accents for snow and to my penguins and stamped a sentiment that was cut down to fit my card. I hope you like my card. I had fun making it.

Join us over in the Build Your Stash Holiday Cardmakers Facebook group to play along with the {BYSHC} Sketch Challenge 34!! We’d love to see what you create using the June sketch!

The sketch challenge will run from today, June 1st, and will end June 30th at 11:59pm PST. Entries must be added to the challenge album in the Build Your Stash Holiday Cardmakers Facebook group to be eligible for a prize. And this month’s challenge is Sponsored by Colorado Craft Company!! The winner will receive a wonderful prize pack of Colorado Craft Company stamps! The winner will be chosen randomly from the entries and announced in the Facebook group. Can’t wait to see what you all create!

A Sea of Thanks

Hi everyone! Today I have a card to share using the New Turtle Bay Stencil and New Oh Bite Me Stamp set from A Colorful Life Designs. Use my code VonFan10 to save 10% off your total purchase. My code excludes the Master Creator Bundle.

This is such a fun stencil. I love turtles. This would make a great Father’s Day card too. On my card I started out with some white cardstock and ink blended it with Villainous Potion Distress Oxide ink, Peacock Feathers Distress ink, and Salty Ocean Distress Oxide ink. I then used blue metallic paint and flickered some with water all over my ink blended background.

I cut out my background using a stitched A2 rectangle die. I stamped and heat embossed a sentiment from the Oh Bite Me Stamp set with a blue glitter embossing powder and Versamark ink. I then cut out my sentiment using a circle die. I popped it up onto my panel using foam tape. I added my panel to a A2 card base using liquid glue and added some sequins. I hope you like my card. Use VonFan10 to save and you can view the New Release here.

Supplies:

Affiliate Links have been added but of course no extra charge to you when you use my links.
Thank you so much for your support, I appreciate it.

Tropical Flowers

Hi everyone! I have a card today using the New 6×9 Tropical Flowers Stencil from A Colorful Life Designs. Use my code VonFan10 to save 10% off your purchase. Excludes the Master Creator Bundle that is already marked down 20% off.

I love the New Tropical Flowers stencil. It’s a 6×9 so perfect for any size card. I started out with white cardstock and ink blended this beautiful stencil with warm colors such as Spiced Marmalade Distress Oxide ink and Abandoned Coral Distress Oxide ink. I ink blended some blue ink left over on my blue brush in between the flowers. I also splattered some blue paint splatters onto my background.

I cut out my background with a stitched A2 rectangle die. I chose to fussy cut one of the left over flowers that I ink blended. I placed my panel into my Misti Stamping Platform and stamped a sentiment from the Happy Thought stamp set with black ink. Next, I added the flower I fussy cut with foam tape to my panel. And lastly, I added my panel to a A2 card base and added some gems. I hope you like my card. I had fun making it. You can visit the New Release here and use my code VonFan10 to save.

Until Next Time, Happy Crafting!

Supplies:

Affiliate Links have been added but of course no extra charge to you when you use my links.
Thank you so much for your support, I appreciate it.

Think Happy Thoughts

Hello everyone! I made a card today for Newton’s Nook Designs Inky Paws Challenge-Rainbow #199. I couldn’t pass up a rainbow challenge and I love Newton’s Nook designs products.

For my card I decided to use a Stencil. I love the Mugs Stencil and I don’t use it quite enough. I also love Coffee so much. I first grabbed some white cardstock 80lb. I placed my stencil over my cardstock using my Make Art Stay-tion. I ink blended the mugs using Distress Oxide inks in Rainbow Colors. I started with Lumberjack Plaid Distress Oxide ink, Carved Pumpkin Distress Oxide ink, Squeezed Lemonade Distress Oxide ink, Mowed Lawn Distress Oxide ink, Salty Ocean Distress Oxide ink, and Seedless Preserves Oxide ink. Super fun. I cut my panel out smaller than a A2 size using a rectangle die from my stash.

I used a retired well loved stamp set from Newtons Nook’s Designs called Happy Little Thoughts. I stamped my sentiment onto white cardstock with black ink and cut it out using my paper trimmer. I chose to layer it onto black cardstock. I glued my sentiment to my panel using liquid glue and I also glued my panel to a gray A2 top folding card base. I added some gems and that finishes off my card. I hope you like it. Happy Thoughts are these mugs in Rainbow colors.

Until Next Time, Happy Crafting!

Supplies:

Mr. Bubble

Hi everyone! I have a Slimline card today using a New Stencil from A Colorful Life Designs called Mr. Bubble. Make sure and use my code VonFan10 to save 10% off your purchase.

Isn’t this a great stencil? I started out with some white cardstock and used Mr. Bubble 6×9 stencil with Simon Says Stamp Hybrid High Dive ink cube ink. I then cut out my background with a scalloped Slimline die from Mama Elephant called Slim Film City.

I love the look of Jellyfish. Watching them at Aquariums is as close as I want to be lol. I do have videos of them and they are nice to watch. So, I thought using this Painted Jellyfish Stamp and die set from Altenew would be fun for this background. I used black dye ink, Simon Says Stamp Teenie Bikini Hybrid ink cube, Spiced Marmalade Distress Oxide ink, and Picked Raspberry Distress Oxide ink to layer my Jellyfish. I then cut them out with the Coordinating Dies. I glued my background to a dark gray Slimline card base with liquid glue and added foam tape to the back of one Jellyfish. The other Jellyfish I glued with liquid glue. I stamped a sentiment with black ink from the same stamp set and cut it out with a die before adhering it to my background with foam tape. I hope you like it. Use VonFan10 to save 10% off your purchase at A Colorful Life Designs.

Supplies:

Affiliate Links have been added but of course no extra charge to you when you use my links.
Thank you so much for your support.

Layered Mermaid

Hello everyone! I have a Mermaid card today using a Layered Mermaid Stencil set from A Colorful Life Designs Newest Release. Use VonFan10 to save 10% off your purchase.

This New Layered Mermaid Stencil set is so neat. It comes with 3 stencils and 3 negatives. And they are marked just for you. On white cardstock, I layered my mermaid using Uncharted Mariner Distress Oxide ink as well as Salvaged Patina Distress Oxide ink.

I used some Copic Markers to color in my mermaid. I then cut my mermaid out with a Lacy rectangle die. I cut out a purple rectangle and then I used the same die set to cut out a blue stitched rectangle die. I layered them all together.

I stamped a sentiment and tied a hemp bow. I glued everything to a A2 card base and added white gel accents. I hope you like it. Use VonFan10 to save 10% off excludes Master Creator Bundle which is already marked down 20%. Check out the New Release here.

Supplies:

Affiliate Links have been added but of course no extra charge to you when you use my links.
Thank you so much for your support.

Stitching, a Rainbow, and Some Cute Mice

Hello everyone! I have a fun card video. Yes a video for today yay! I had so much using some new to me stamps and dies sitting on my desk. I’m so excited to have used these products from Lawn Fawn Finally!

I started out stitching. I cut out the Rainbow Addo embroidery hoop in black cardstock. I wanted a Neon card. I chose my neon colors in embroidery Floss. I stitched my rainbow. Next, I stamped my images from Sew Very Mice and How You Bean Buttons Add On with Memento Tuxedo ink. I used my Brother Scan N Cut to cut out my images. I used Fluorescent Copic markers as well as E and W Markers to color my images.

I cut out a stitched rectangle using a Christmas pattern paper that Lawn Fawn sent me. Using the smaller snowflakes, I loved it for my background. I stamped and heat embossed my sentiment using a pink embossing powder on black cardstock. I then cut my sentiment with a paper trimmer and added foam tape to the back.

I adhered my images some with liquid glue and some with foam strips to a A2 kraft side folding card base. I layered my embroidery hoop with pink cardstock and gray cardstock for the screw. Lastly, I added Glitter glaze and white gel accents using my Gelly Roll pen. I hope you like my card. I really like it and hopefully I can give it up LOL. I still may place a mouse with a bow in the inside of the card. I will also be linking my card to the Simon Says Stamp Wednesday Challenge-Anything Goes.

You can watch my card down below or on YouTube

Until Next Time, Happy Crafting!

Supplies:

Affiliate Links have been added but of course no extra charge to you when you use my links.
Thank you so much for your support.

Some Copic Markers used: R01, C6, W2, E33, E35, W4, FRV1, E30, E51, FVG2, E31, FYG1, W1, YR68

Stay Wild Ocean Child

Hi everyone! I have another card to share with you using A Colorful Life Designs Newest Release. There are New Stencils and New Stamps this month. It’s very exciting! Use VonFan10 to save on your next purchase only excludes Master Creator Bundle.

I love this card. I used the New Wave Cloud Stencil, Oh Bite Me Stamp, and Chasing The Sun Stamp all from the New Release. On white cardstock, I used Uncharted Mariner Distress ink and Salvaged patina Distress ink for the Wave Cloud. It’s super easy to ink blend using the stencil. I used a A7(5×7) rectangle die to cut out my background. I had cut out some Surfboard SVG’s in white cardstock from my Silhouette Cameo Library using my Silhouette Cameo 3 cutting Machine.

I ink blended the surfboards with Candied Apple Distress ink, Squeezed Lemonade Distress ink, and Mowed Lawn Distress ink. On the candied Apple surfboard I used the Wave Cloud stencil and ink blended it in a heavier hand with the same ink. On the Mowed Lawn Surfboard I used a fish from Oh Bite Me stamp that I heat embossed with black ink and clear embossing powder. On the Squeezed Lemonade surfboard I used Stardust ink from Concord and 9th to stamp the shells from Chasing the sun stamp. I stamped and heat embossed a sentiment from the Chasing the sun stamp with white embossing powder and white ink on blue cardstock. I fussy cut around my sentiment. I put my card together with liquid glue and foam tape to a A7 card base. (5×7) I then added some sequins. I hope you like my card, it was a lot of fun to make. Don’t forget to use my code VonFan10 to save. Visit the New Release here.

Supplies:

Affiliate Links have been added but of course no extra charge to you when you use my links.
Thank you so much for your support.

A Colorful Life Designs June 2023 Release

Hello everyone! It’s June and A Colorful Life Designs has a New Release and it’s packed with fun goodness. Lots of New Stencils and 2 great stamp sets. Also don’t forget to use VonFan10 to save 10% off your purchase. Excludes Master Creator Bundle.

This Monstera Leaves Stencil is so pretty. It’s a 6×9 stencil so perfect for any size card. I used Hammermill cardstock 110lb. I placed my stencil on to my Make Art Stay-tion and used the magnets to hold my stencil down in place. I ink blended with Bundled Sage Distress Oxide ink. I then cut my background out with my paper trimmer smaller than a A2 size.

I had some animal planters already put together that are a SVG file from the Silhouette Cameo Store. I glued my background to a green A2 card base and glued my plant. I stamped a sentiment from Altenew Meadow Flower Stamp set on white cardstock with Versafine ink. I cut it down and made a fishtail banner. I added foam strips and adhered it to my card. Use my code VonFan10 to save and check out the New Release here.

Supplies:

Affiliate Links have been added but of course no extra charge to you when you use my links.
Thank you so much for your support.

Bysh Cardmakers Sketch 34

Hi everyone! I hope you are doing well. It’s June and that means there is a New Bysh Cardmakers Sketch 34 yay. I love it and I know you will too!

I couldn’t help myself I wanted to use this New Anya from The Greeting Farm Preorder Reboot Kit for the New Sketch. This sketch is great to make a scene. I will try and do that for my next project. I stamped and colored anya in black Tuxedo ink from Memento on Neenah Solar White cardstock. I colored her in with my Copic Markers to match a Christmas Paper Pack from Joanne’s called Come Together. I really love the non traditional colors in this Christmas Paper Pack. I paper pieced Anya’s Beanie and cut out other pattern papers to match the Sketch. I fussy cut Anya as well as using a craft knife to cut out extra white spaces.

Next, I stamped a sentiment from a older The Greeting Farm Kit called Secret Santa. I love this kit too. I used red ink on white cardstock and cut my sentiment with a paper trimmer. I then glued everything to a A2 card base and added some snowflake confetti. I also added some pink chalk to Anya’s cheeks. I hope you like my card and give it a try.

Sketch 34 for the month of June.

Come join us in the Build Your Stash Holiday Cardmakers Facebook group to play along with the {BYSHC} Sketch Challenge 34!! We’d love to see what you create using the June sketch!

 Entries must be added to the challenge album in the Build Your Stash Holiday Cardmakers Facebook group to be eligible for a prize. The winner will be chosen randomly from the entries and announced in the Facebook group. Join in the fun and start building your stash of holiday cards now. Can’t wait to see what you all create!

Anya Teacher Cards

He everyone! It’s that time again for Teacher Cards and when I received The Greeting Farm Anya Reboot Preorder Stamp Kit. I knew I would use Anya holding the apple for Teacher Cards. We have a really great teacher and even though I only need 1 card I couldn’t help but make 2 cards.

On my first card, I stamped my image onto Neenah Solar White with Memento Tuxedo Black ink. I colored her up with my Copic Markers and then fussy cut her out. I then used a background stamp from Pinkfresh Studio with Catherine Pooler Lilac ink that I stamped onto white cardstock. I cut it out with a stitched A2 rectangle die. I have had this notebook die from Paper Smooches forever that is retired unfortunately that I cut out with white cardstock. This retired apple die is another die I finally got to use from Your Next Stamp and I cut it out and the leaf with white cardstock and ink blended it with Pinkfresh Studio in Passion Fruit, Lawn Fawn Crunchy Leaf for the stem, and the leaf with Simon Says Stamp in Lucky ink.

Next, I stamped a sentiment from Trinity Stamps onto the notebook with black ink. I also glued my apple and leaf to it. I glued everything to a A2 card base and added my image with foam tape and added gems and white gel accents. Isn’t she cute?

My next card, I stamped her and also colored her similar with Copic Markers and fussy cut her out. I removed some diamond stamps from the Background stamp and I love that you can do that. I stamped the background stamp in Catherine Pooler Do Si Do ink I decided Anya would be the only focal point. My background was cut out with a stitched rectangle die. I stamped the sentiment again but I cut it out as a strip using my paper trimmer.

I added everything to a A2 card base and popped up Anya and my sentiment with foam strips. Lastly, I added some confetti sequins, white gel accents, and pink chalk for Anya’s cheeks.. I hope you like my Teacher Cards. I had so much fun making them.

Until Next Time, Happy Crafting!

Supplies:

Affiliate Links have been added but of course no extra charge to you when you use my links.
Thank you so much for your support.

May 2023 Woodblock Wednesday

Hi everyone! I have a card today that I made for the Woodblock Wednesday Challenge that started May 24, 2023 until May 29, 2023 hosted by my friend Amy Tsuruta. To be honest I wasn’t sure I could get a card done for the Woodblock Wednesday challenge. I had family visiting and staying with us and you know how that is LOL. But yay I got a card done, I hadn’t crafted in like 8 days….it felt so good to get inky again!

Here are the Woodblock Stamps I used:

I was having some tropical vibes, so I went with this pineapple, chevron, and Thinking of you sentiment for my choice of Woodblock stamps today. I have had these stamps for quite awhile and I believe it was my first time inking them up so Yay! I first inked up the Chevron stamp with the Catherine Pooler Eucalyptus ink cube on white cardstock. I also stamped it again but side by side to get a full panel. Next, I stamped the pineapple in Catherine Pooler Pucker Up Regular Size ink pad, Catherine Pooler Sauna Ink Cube, Catherine Pooler Green Tea ink cube, and Catherine Pooler Eucalyptus ink cube on white cardstock. I then fussy cut all the pineapples. I love that sentiment on the pineapple.

I cut out my Chevron panel out with a stitched rectangle die. I thought it was fun to add some pineapple foiled pattern paper for a border so I cut it out with the same stitched rectangle. I stamped the Thinking of you sentiment woodblock with black ink and then cut it out with a paper trimmer. I cut out some pink cardstock with a A2 stitched rectangle die and layered my rectangle panels with liquid glue. I glued them to a Neenah Solar White 110lb. card base. I glued my pineapple pattern paper border with liquid glue and added my pineapples with foam tape. I glued my Thinking of You sentiment with liquid glue and added some yellow gems. I hope you like my card. I really had fun putting it together and it was nice that there was no coloring involved. I also loved that I could use colored inks and my woodblock stamps. I hope you’ll give your Woodblock stamps a try!

Until Next Time, Happy Crafting!

Supplies:

Affiliate Links have been added but of course no extra charge to you when you use my links.
Thank you so much for your support.