Stars and Stripes

Hi everyone. Happy Independence Day. I have a fun festive card Today I used some fun stencils from A Colorful Life Designs. Use VonFan10 to save 10% off your purchases.

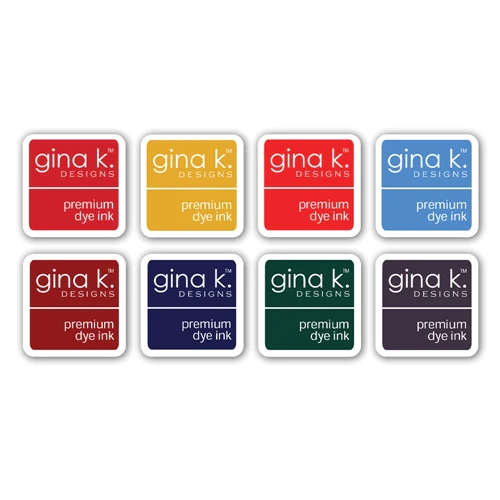
I used the Stars and Stripes Stencil and Balloon Set Stencil from A Colorful Life Designs for my card today. I love these stencils. I started out with white cardstock. I used the Stars and Stripes Stencil first using the Diagonal Lines in Red Hot ink cube from Gina K Designs. I then used the Balloon Set Stencil for the Star Balloons that I ink blended with Gina K Designs Blue Denim ink cube. I also ink blended the Balloon strings and the Balloon knots. I then took the Stars and Stripes stencil for the tiny stars that I ink blended in the star balloons with Hero Arts Unicorn ink.

I cut my background to be smaller than A2 and glued it to a A2 side folding card base. I added a sentiment strip pre-made from my stash and adhered it with a foam strip. That finishes my card. I chose no embellishments I thought it had enough detail. I hope your Holiday is fun and safe.

Thank you for stopping by! Visit the New Release here.

Supplies:

Affiliate Links have been added but of course no extra charge to you when you use my links.
Thank you so much for your support, I appreciate it.
Sending Happy Thoughts

Hello everyone. Today for my card I’m using the New Marvelous Masks Postage Stamp Set A from A Colorful Life Designs July 2023 Release. There are 2 New sets A & B just added to the store. They are greats sets to own and I think you will reach for them a lot for your projects. Use VonFan10 to save 10% off your order. My code only Excludes the Master Creator Bundle marked down 20%.

I actually used 2 stencils for my card. I started out with white cardstock and ink blended the New Marvelous Masks Postage Stamp #5 Stencil with Simon Says Stamp Bubblegum ink. I then placed my second stencil Love Letters over the Postage Stamp and ink blended with Simon says Stamp Teeny Bikini ink. I love how it looks with a white border.

Next, I used a stitched A2 rectangle die and cut out my ink blended background. I stamped my sentiments from the Happy Thoughts Stamp set with black ink and added some pink sequins. My panel was then added to a A2 side folding card base. I hope you like it. What I love about this stencil set is that you get masks so you can create with more colors or a scene oh how about a Post card? The possibilities are endless. I hope you grab these sets.

Thank you so much for stopping by. Check out the New Release here.

Supplies:

Affiliate Links have been added but of course no extra charge to you when you use my links.
Thank you so much for your support, I appreciate it.

A Colorful Life Designs July 2023 Release

Hello everyone. I’m so excited for the New A Colorful Life Designs July 2023 Release. I have a video today showing the New Layered Arches Stencil and New Amazing Stamp set. You can always use my code VonFan10 to save 10% off your purchases.

You can watch below or on my YouTube Channel

I used the New Layered Arches Stencil and Amazing Stamp Set. This set comes with 2 stencils. I used the brick stencil only for my card today. I ink blended with some Hammermill cardstock 110lb. with Milled Lavender Distress Oxide ink with the Arches Stencil. I used my Make Art Stay-tion to ink blend easily. I then used Catherine Pooler ink in Dress Blues to help with my background. You can easily leave it white or this stencil will be your stencil for a lot of Occasions in a variety of colors.

Next, I cut my background A2 size 4 1/4 x 5 1/2 using my paper trimmer. I then placed my panel in my Mini Misti stamping platform and stamped a sentiment from the New Amazing Stamp set with Versafine black Onyx ink. I used a butterfly die set from Tim Holtz and ink blended the base of the butterfly with Milled Lavender Distress Oxide ink and cut out the top with black cardstock. I glued my panel to a A2 card base and glued my butterfly. I added some sequins and that finishes my card. I hope you like it. I had fun making it as always.

Supplies:

Affiliate Links have been added but of course no extra charge to you when you use my links.
Thank you so much for your support, I appreciate it.
BYSHC Sketch 35

Hello everyone Happy July! There is a New BYSHC Sketch Challenge #35 that starts today and you have all month to play. I really think your going to love this one!!

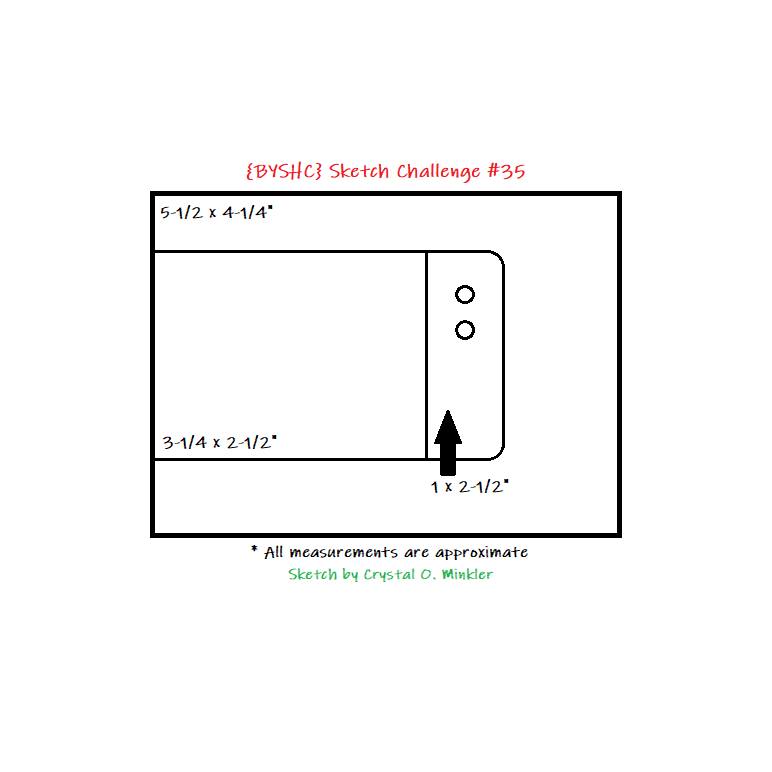
I love this New sketch!!! I chose to use Unity Stamp Company Whit’s Weenies Rubber stamps illustrated by Angie Blom. I already had these stamped images stamped and cut out with my Brother Scan N Cut. So for this card I used the one pup and tree. I cut out some Christmas Pattern Paper from American Crafts 6×6 paper Pad from my stash using the measurements on the Sketch 35 and my paper trimmer.

I glued everything to a A2 side folding card base. I stamped a sentiment from the same stamp set on a stitched white cardstock banner die-cut with black ink. For the 2 round elements on the sketch I used ribbon that was actually gifted to me from Unity Stamp Company with a purchase. I folded it and cut it to desired. That’s it for this card. I hope you like it and give this sketch a try.

Come join us in the Build Your Stash Holiday Cardmakers Facebook group to play along with the {BYSHC} Sketch Challenge 35! We’d love to see what you create using the June sketch!

The sketch challenge is open for the entire month of July. Entries must be added to the challenge album in the Build Your Stash Holiday Cardmakers Facebook group to be eligible for a prize. The winner will be chosen randomly from the entries and announced in the Facebook group. Join in the fun and start building your stash of holiday cards now. Can’t wait to see what you all create!

Caffeinated Christmas Card Challenge July-Stars

Hello everyone! I’m super excited that A Colorful Life Designs is a sponsor for the Caffeinated Christmas Card Challenge#19 for July. The Theme is Stars. You must make a new Christmas Card featuring Tea, Coffee, or Hot Cocoa using Stars. Also don’t forget to use my coupon code VonFan10 to save at A Colorful Life Designs. Also you can win a gift code to A Colorful Life Designs by participating in this challenge.

On my Caffeinated Christmas card, I chose to use the Fa La La Stencil, Night Sky Stencil, Coffee Stamp, and Cozy Knit Stencil. I first grabbed some Navy A2 Cardstock and used the Night Sky Stencil with some White pigment ink from Gina K Designs for my stars. On white cardstock, I ink blended Lumberjack Plaid Distress ink with the Fa La La Stencil and cut my background with my paper trimmer. I cut out a coffee mug SVG with my Silhouette Cameo using white cardstock from the Silhouette Cameo Design Store. I ink blended the mug with the Knit Stencil using Rustic Wilderness Distress Oxide ink and Lumberjack Plaid Distress ink. The used Ground Espresso Distress ink for the coffee in my mug.

I stamped my sentiment from the Coffee Stamp set with black ink on white cardstock and cut it with my paper trimmer. I put my card together. I love my different elements to be wonky. How about you? My sentiment is added with foam tape and everything is glued with liquid glue to a A2 card base. Lastly, I added some sequins. I hope you like my Caffeinated Christmas card using Stars. I hope you give it a try. There will be a gift code prize which is always exciting. Visit A Colorful Life Designs here and Link your cards here Use hashtag #cccc19 so we can see your cards.

Supplies:

Affiliate Links have been added but of course no extra charge to you when you use my links.
Thank you so much for your support, I appreciate it.

Layered Lemons

Hi everyone. I have a card today using the Layered Lemons Stencil set from A Colorful Life Designs. I love layered stencils and this one is perfect for Summer. Use VonFan10 to save 10% off on your purchases.

I knew I had to have this layering stencil set. I love Lemons and every Summer I crave making a Lemons card. Something about fruit it screams Summer. I first used white cardstock and used the top stencil first and ink blended my lemons with Pinkfresh Studio Sunshine ink. I chose a diagonal design. I then used the Base stencil to layer my leaves with Hero Arts Ombre ink.

I cut out my background with a A2 stitched rectangle die. I stamped this cute lemon from Taylored Expressions Tutti Frutti Stamp with black ink on white cardstock and colored it in with my Copic Markers. I fussy cut my image out and stamped a sentiment from the same stamp set. I cut out my sentiment and popped up my lemon and sentiment with foam tape. I glued my panel to a A2 card base. I added some white gel accents with my gel pen and that finishes off my card. I hope you like it. Check out the newest release here

Supplies:

Affiliate Links have been added but of course no extra charge to you when you use my links.
Thank you so much for your support, I appreciate it

Make A Splash

Hello everyone. I have my last card sample using the New June Release from A Colorful Life Designs. Isn’t it a great release? I love Summer Theme Cards. Don’t forget to use my code VonFan10 to save 10% off your purchases.

I think I saved my best card for last. I love these Marvelous Masks Stencils. This one is called Marvelous Masks Bathing Suit. I used stencil #3 for my card today. I used Rainbow colored inks on white cardstock for my Slimline card. I used Lumber Jack Plaid Distress Oxide ink, Carved Pumpkin Distress Oxide ink, Squeezed Lemonade Distress Oxide ink, Mowed Lawn Distress Oxide ink, Uncharted Mariner Distress Oxide ink, and Villanious ink. Do you love my rainbow bathing suit?

Next, I cut out my Bathing Suits with a Wonky Slimline die from Trinity Stamps. I glued my panel to a Slimline card base. My sentiment is from Pink and Main’s Stay Cool Stamp and die set. I hope you like my card. I had fun making it. Use my code VonFan10 to save. Visit the Newest release here

Supplies:

Affiliate Links have been added but of course no extra charge to you when you use my links.
Thank you so much for your support, I appreciate it

Groovy Wave

Hello everyone. I have another card using a fabulous New Stencil from A Colorful Life Designs. Use VonFan10 to save 10% off your purchase.

On my simple notecard, I used the New Groovy Wave Stencil. I love this funky style. I think its a beautiful stencil and could be used for any Occasion like I used it today. On white cardstock I ink blended the stencil and used Wilted Violet Distress ink and Raspberry Distress Oxide ink. I sprayed some Dylusions ink spray in Funky Fuchsia over my background.

I cut out my background when it was dry with a Mod Rectangle die from Pink and Main using the largest die from the set. I then added a die-cut from my stash and glued my panel to a blue card base. I hope you like my simple card for today. I recommend using this stencil with Pixie Spray for great results. Use VonFan10 to save 10% off your total purchase. Check out the Newest Release here

Supplies:

Affiliate Links have been added but of course no extra charge to you when you use my links.
Thank you so much for your support, I appreciate it

Have A Holly Jolly Christmas

Hello everyone! I have a card to share today that I made for the Masculine Caffeinated Christmas Card Challenge. Rubbernecker Stamps is the Sponsor, so amazing so I wanted to participate.

I always love making Caffeinated cards especially Christmas with Critters. I had to use this cute fox stamp set from Rubberneckers Stamps called Be Wild. On Neenah Solar White 80lb. I stamped some foxes and a mouse from the stamp set with Memento Tuxedo Black ink. I colored them in with my Altenew Alcohol Markers and then fussy cut my images out. I also stamped a Christmas hat and coffee cup from some of my stamps from Catherine Pooler and Avery Elle and fussy cut those out too.

The coffee stitched dies are from My Creative Time called Coffee Gift Card Holder Die that I finally used. I cut my dies out from a Christmas Pattern paper pack 6×6 from Hobby Lobby as well as plain cardstock. I found this sentiment strip in my box of sentiments pre-made so I thought it was perfect for my card. I glued everything to a A2 card base and popped up my fox, mouse, and sentiment with foam strips. Since this is a masculine card I chose no sequins or anything. Only white gel accents with my Gelly Roll pen. I hope you like my card and maybe gave you some inspiration.

Thank you for stopping by!

Fancy Palm

Hi everyone. I have another card featuring A Colorful Life Designs Newest Release. I hope your loving the New Release as much as I am. Use VonFan10 to save 10% off your purchase.

I used the New Fancy Palm Tree Stencil and New Chasing The Sun Stamp Set. I also used Simple Spirals Stencil from a previous Release. I love how big this palm tree is. I started out with white cardstock and chose to ink blend the Fancy Palm with Carved Pumpkin Distress Oxide ink, Squeezed Lemonade Distress Oxide ink, and Tea Dye Distress ink. I used Salvaged Patina Distress ink for my sky with the Simple Spirals Stencil. I think the spirals remind me of a Summer Breeze.

Next, I cut out my Fancy Palm tree with a A2 rectangle die. I placed my panel inside of my Misti Stamping platform and stamped a sentiment from the New Chasing The Sun Stamp set with black ink. I really love this sentiment. Lastly, I added some gems. I hope you like my card. Use VonFan10 to save. Visit the Newest Release here

Supplies:

Affiliate Links have been added but of course no extra charge to you when you use my links.
Thank you so much for your support, I appreciate it

Pineapples

Hi everyone. I have a Birthday card today with lots of pineapples. I used some New Stencils from A Colorful Life Designs. Use VonFan10 to save 10% off your total purchase.

I used the New Pineapple Stencil 3×6 and Layered Pineapples Stencil 6×6. These are fun stencils. I started out with some white cardstock and used the Layered Pineapples stencils which comes with 2 stencils. I used stencil #1 first with some rainbow colored inks. My blending brushes still had ink on them from a previous project so it worked out for my pineapples to have a soft look. I used Tea Dye Distress ink for the leaves using stencil #2. I then cut my background smaller than a A2 size.

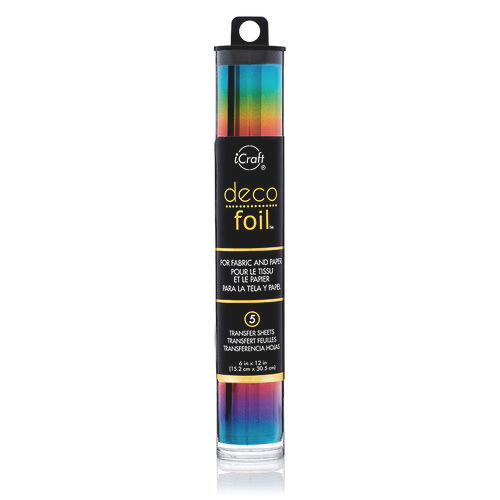
Next, I used the New Pineapple Stencil it is a fun stencil that allows you to layer your stencil and is a good size for the focal point on your card. I used white cardstock with Thermoweb Transfer Gel and Rainbow Deco Foil. When it gel was dry I ran all through my Heidi Swapp Minc Machine. I then fussy cut my Rainbow Pineapple. I chose to add a Birthday sentiment strip. Everything was added to a Kraft A2 card base. That finishes this card. I hope you like my card, I think it’s fun. Don’t forget to use my code VonFan10. Check out the New Release here

Have a Awesome Crafting Day!

Supplies:

Affiliate Links have been added but of course no extra charge to you when you use my links.
Thank you so much for your support, I appreciate it.

Thinking of You

Hello everyone. I made a card for the June Stay Crafty With a Blog Name Hero Challenge-Sentimental Journey.

I thought this pup was so cute to use and it was the first time I had used this retired stamp set called Lounging Pups. I first grabbed some watercolor paper Fabriano Coldpress 140lb. I water colored some water first using a Altenew Watercolor set and a Paintbrush. I used 3 different blue paint Pans in Deep Blue Seas, Lapis, and Crystal Water. I had fun making some messy water and it was quite relaxing too. I also added some green for grass thinking maybe this pup would be in a pool. So I used Rain Forest and Green Hills paint Pans.

Next, I stamped this cute pup in a flamingo floatie and umbrella on Neenah 80lb. Desert Storm Cardstock with black ink. I colored them in with my Prismacolor Colored Pencils and I fussy cut my images out. I cut out my watercolor background with a Infinity Hero Arts Nested Rectangle Die using the largest die. I then cut out my word die sentiment 3 times with white cardstock and glued them together.

Finally, I put my card together. I glued my background panel to a A2 card base. I glued my sentiment onto my panel with liquid glue. I decided my grass looked plain. So, I stamped the grass image several times with black ink. I added very subtle grass and water lines with my colored pencils to my water and grass areas. I ink blended a simple sky with the Hero Hues Arctic ink cube. I added my pup and umbrella with foam tape. And to decorate I added some clear liquid drops to my water, white gel pen accents to my images, and sequins. That finishes my card. I hope you like it. I would love to be relaxing like that pup.

Until Next Time, Happy Crafting!

Supplies:

Affiliate Links have been added but of course no extra charge to you when you use my links.
Thank you so much for your support, I appreciate it.